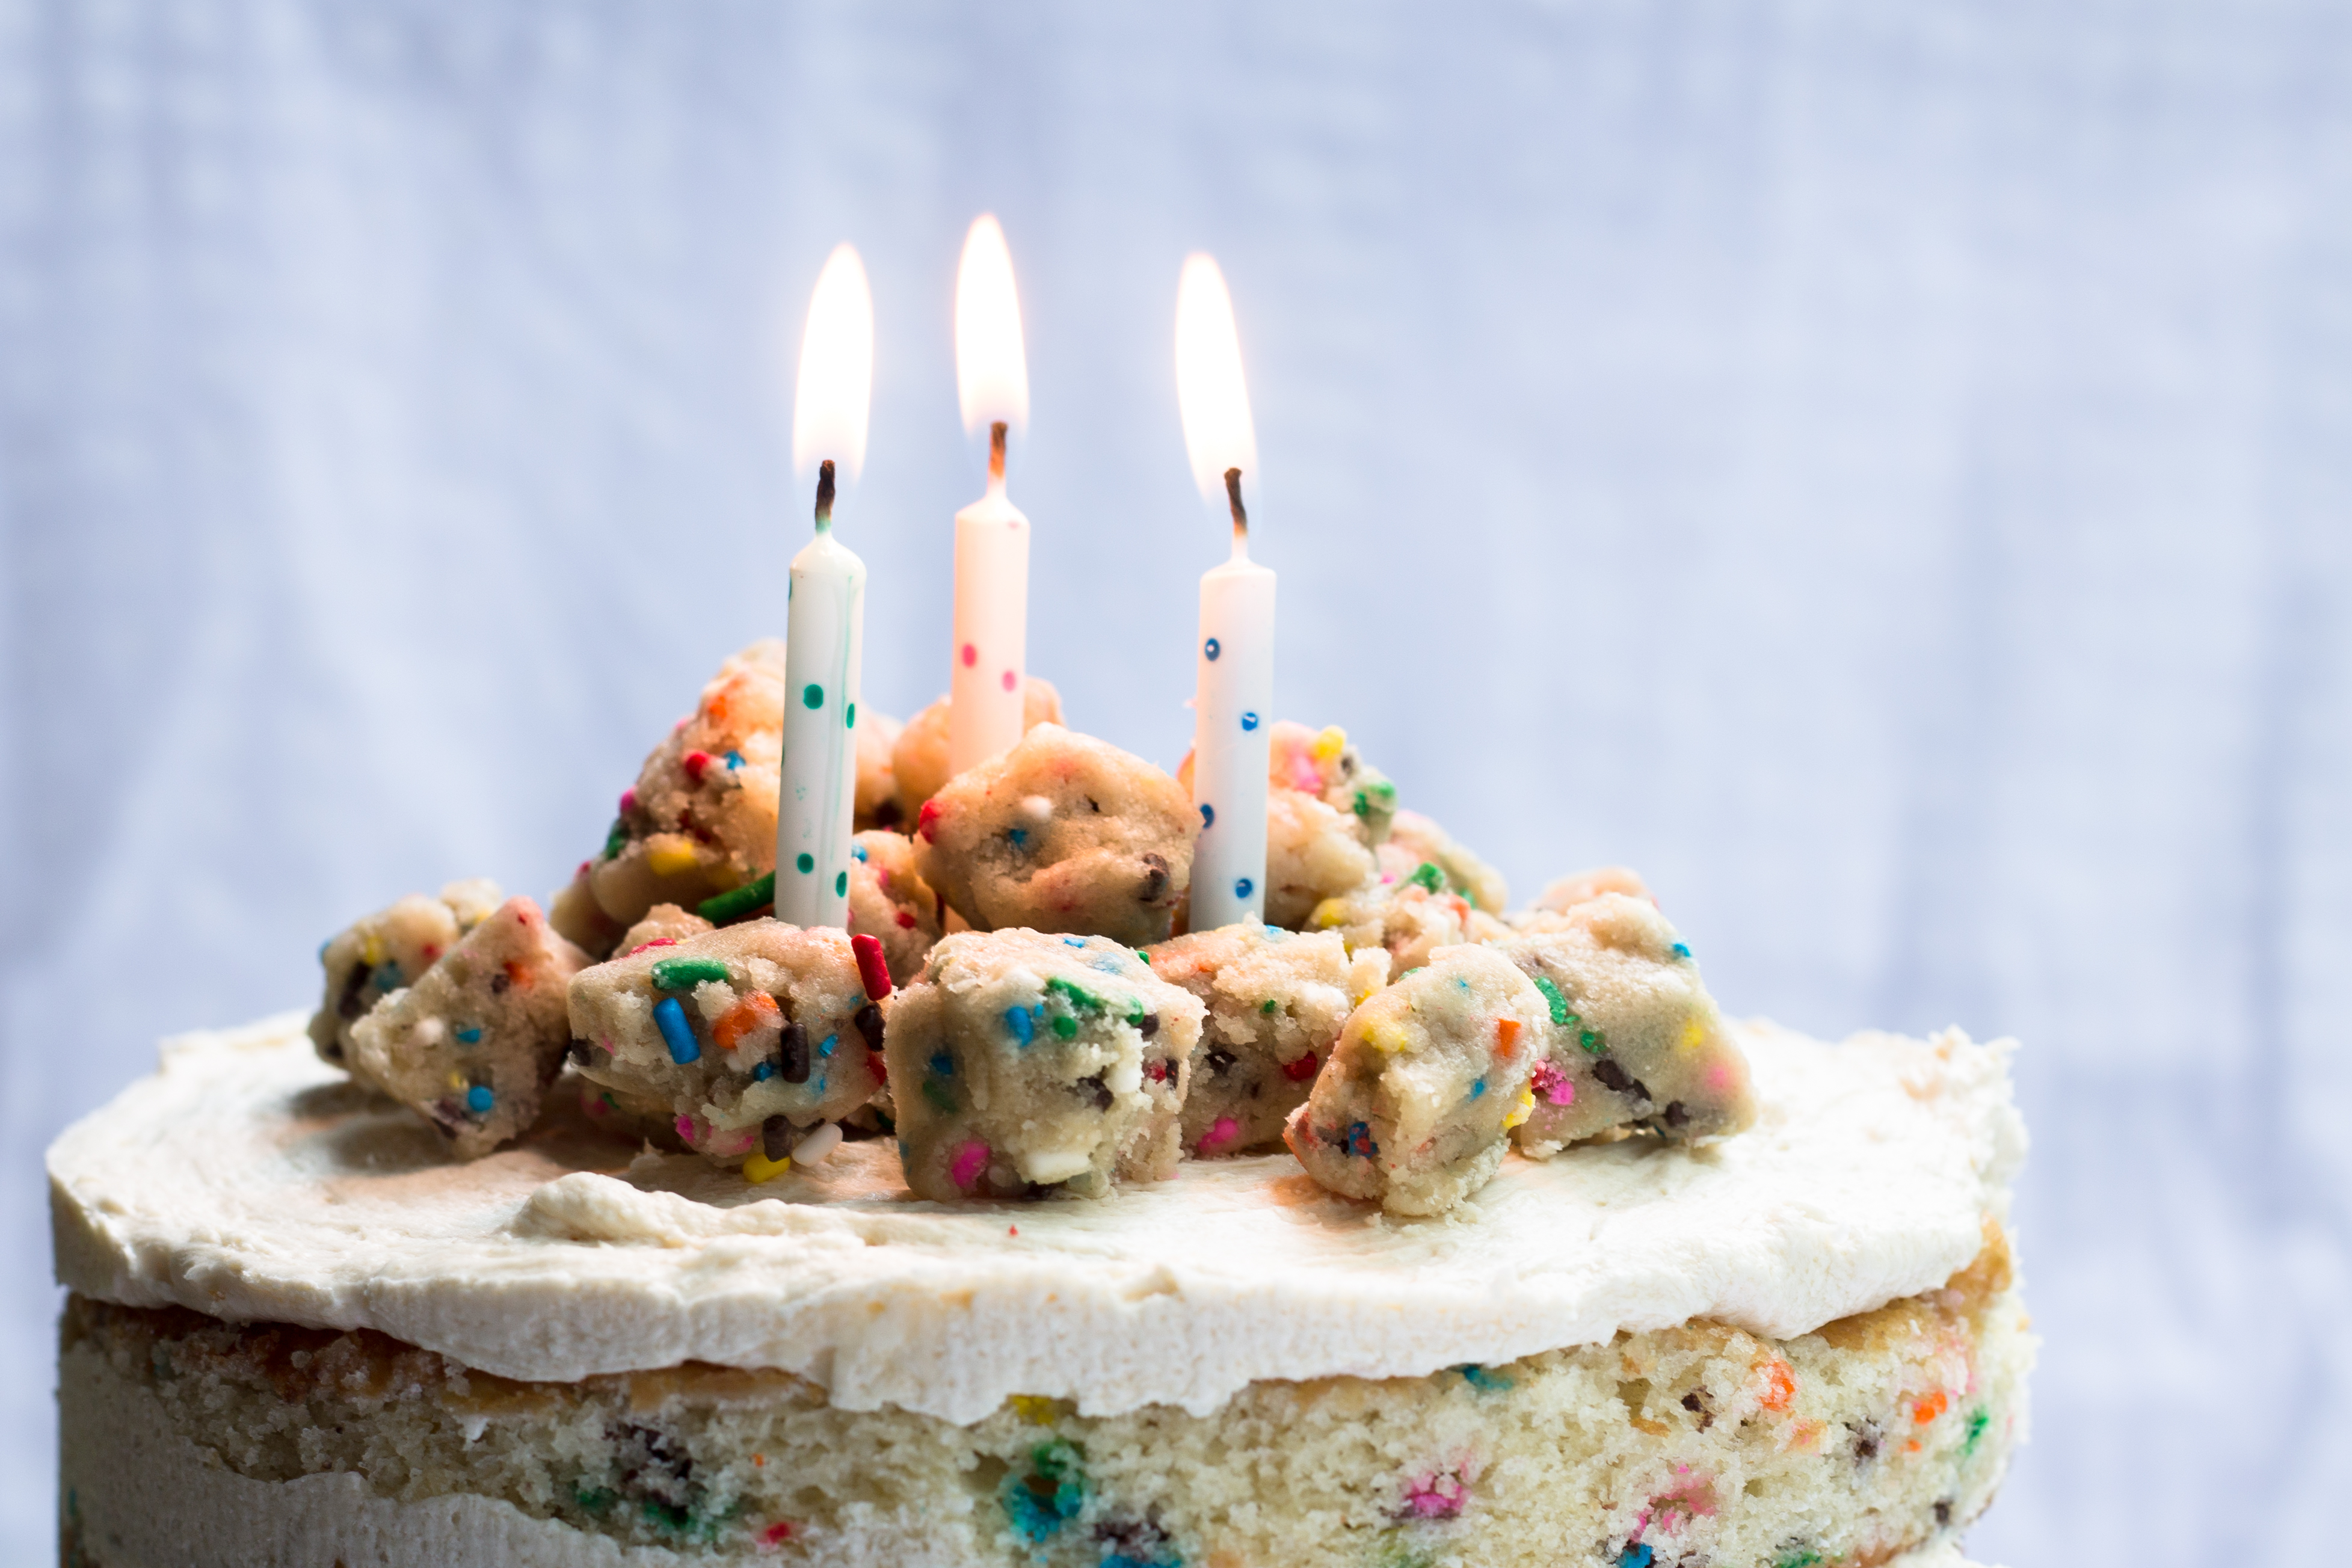
I have seven friends who have celebrated birthdays in the last week (including me!). I thought, what better time to make an over-the-top cake than a week-long birthday celebration?! And just look at that title. Cookie dough Momofuku funfetti birthday cake. What!!!????
This cake was a labor of love (and sometimes disdain). There are a lot of parts and a ton of steps. But, never fear! The end result is absolutely DELICIOUS!

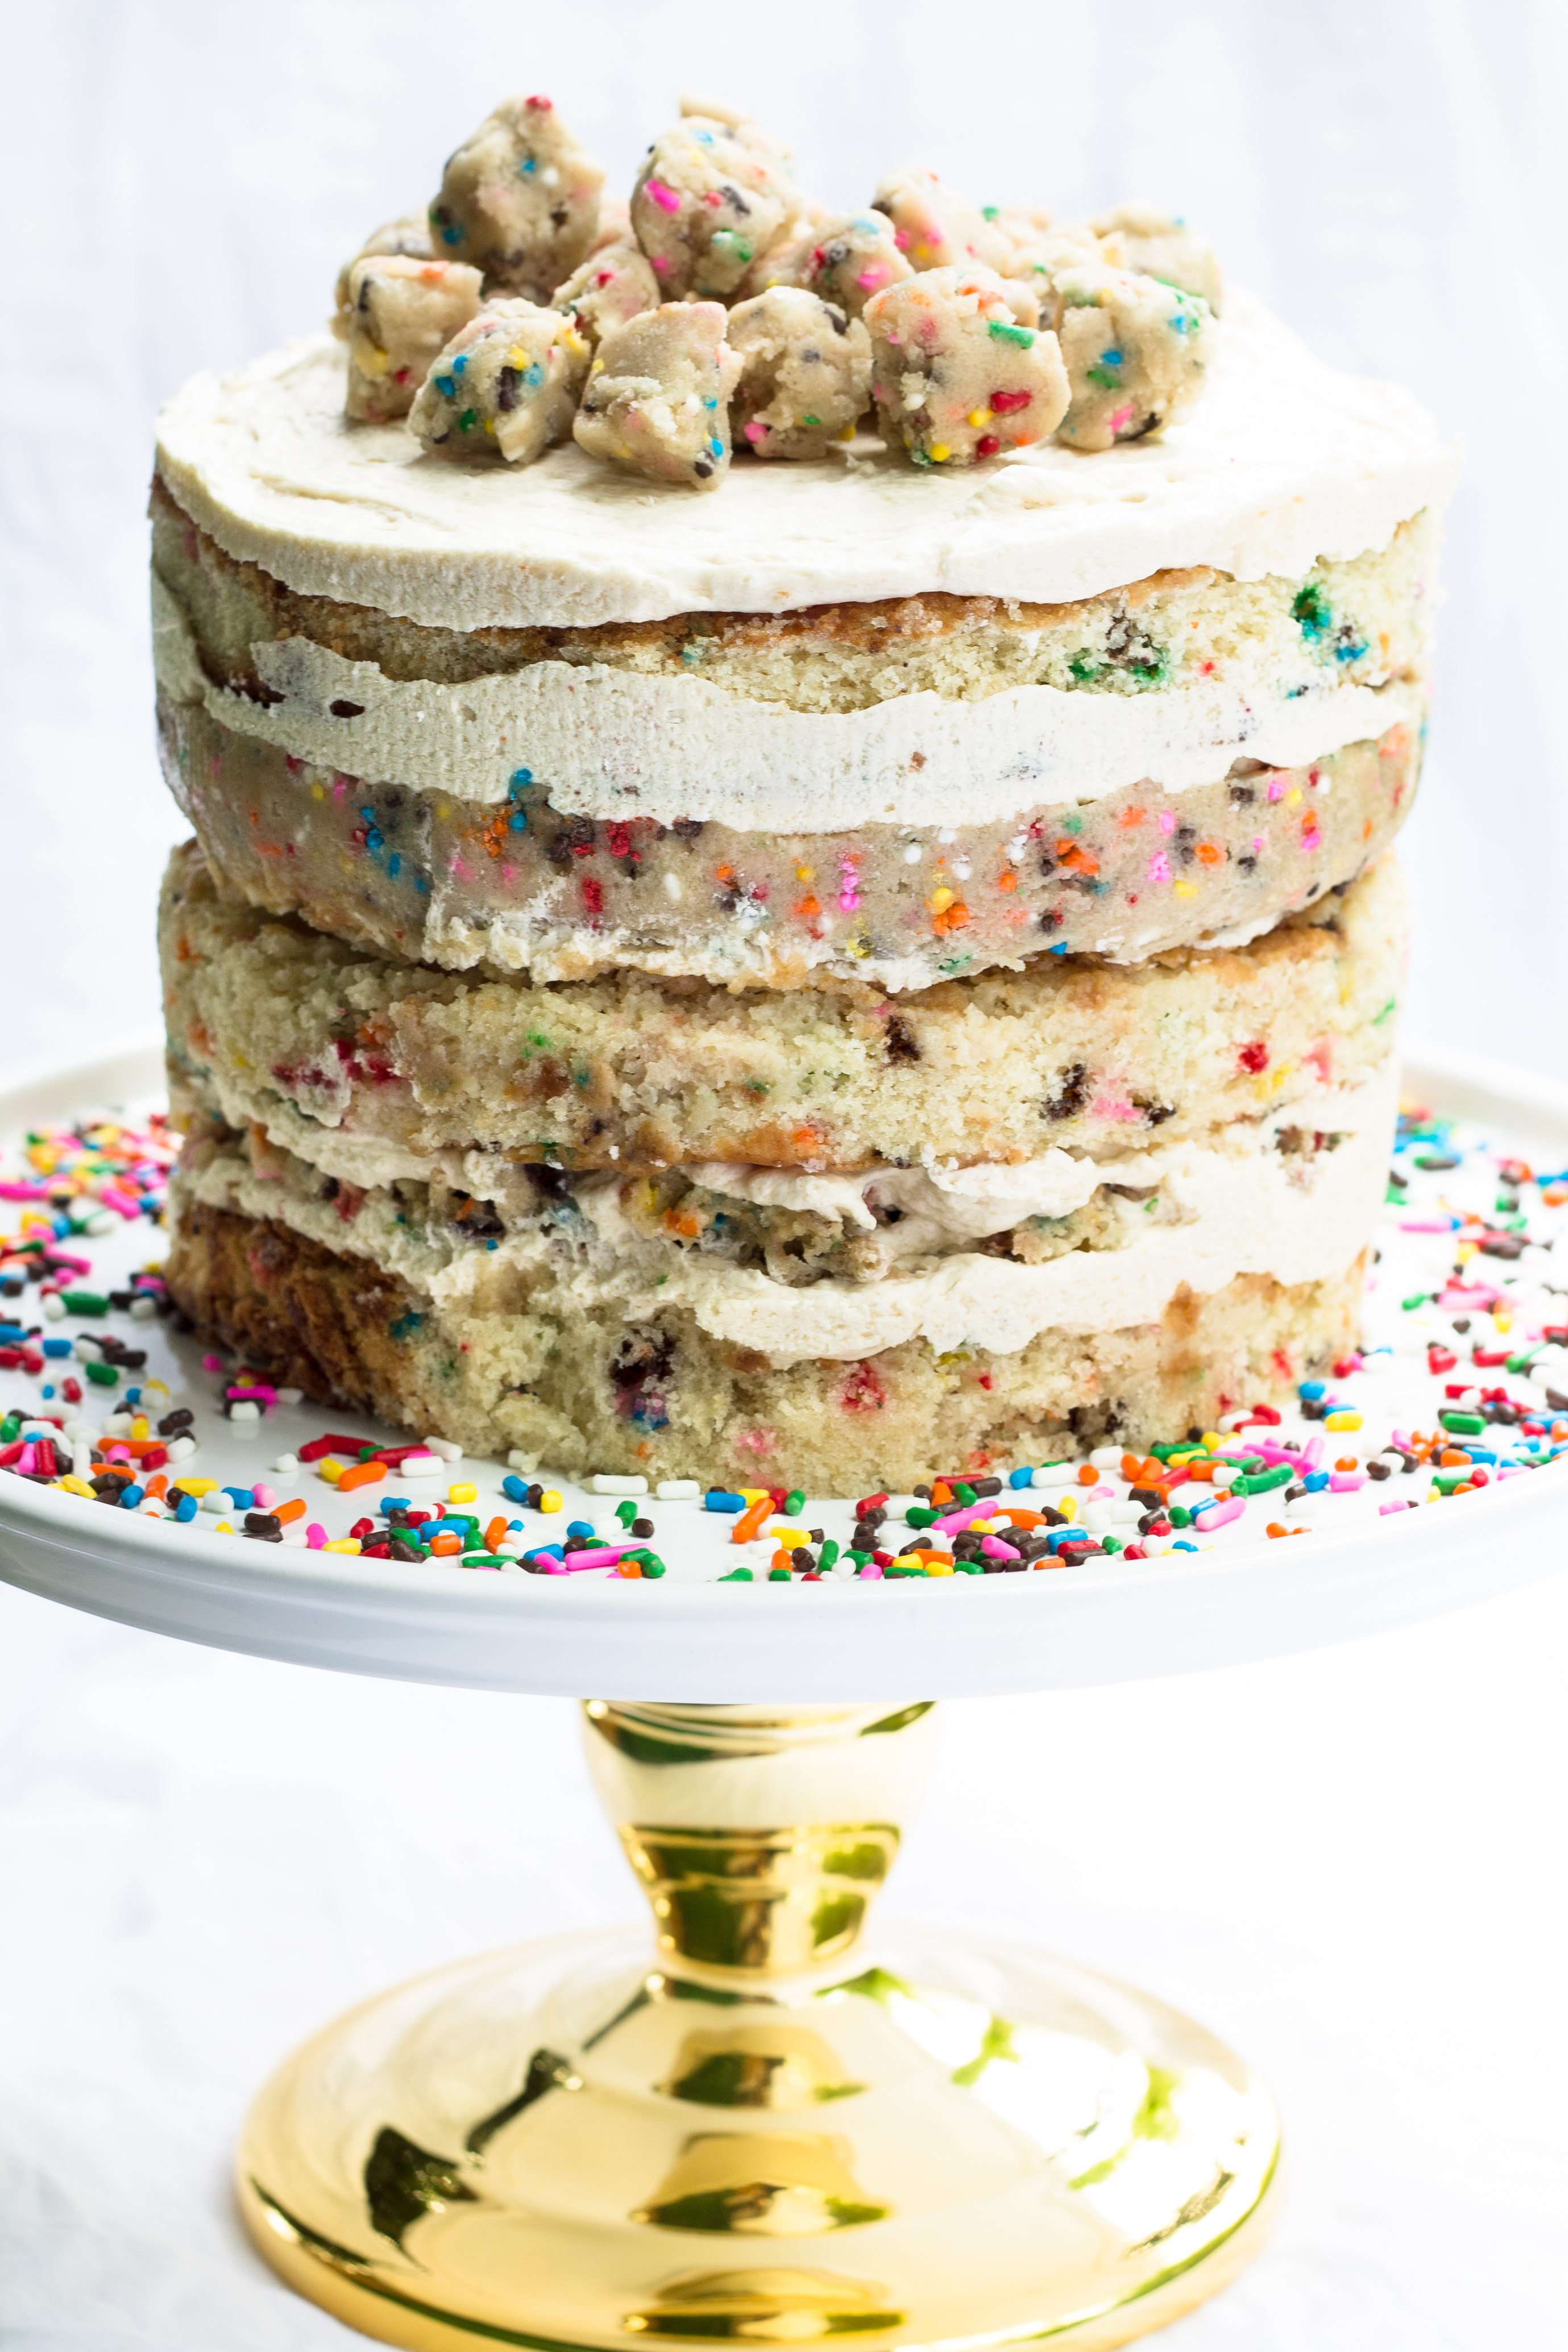
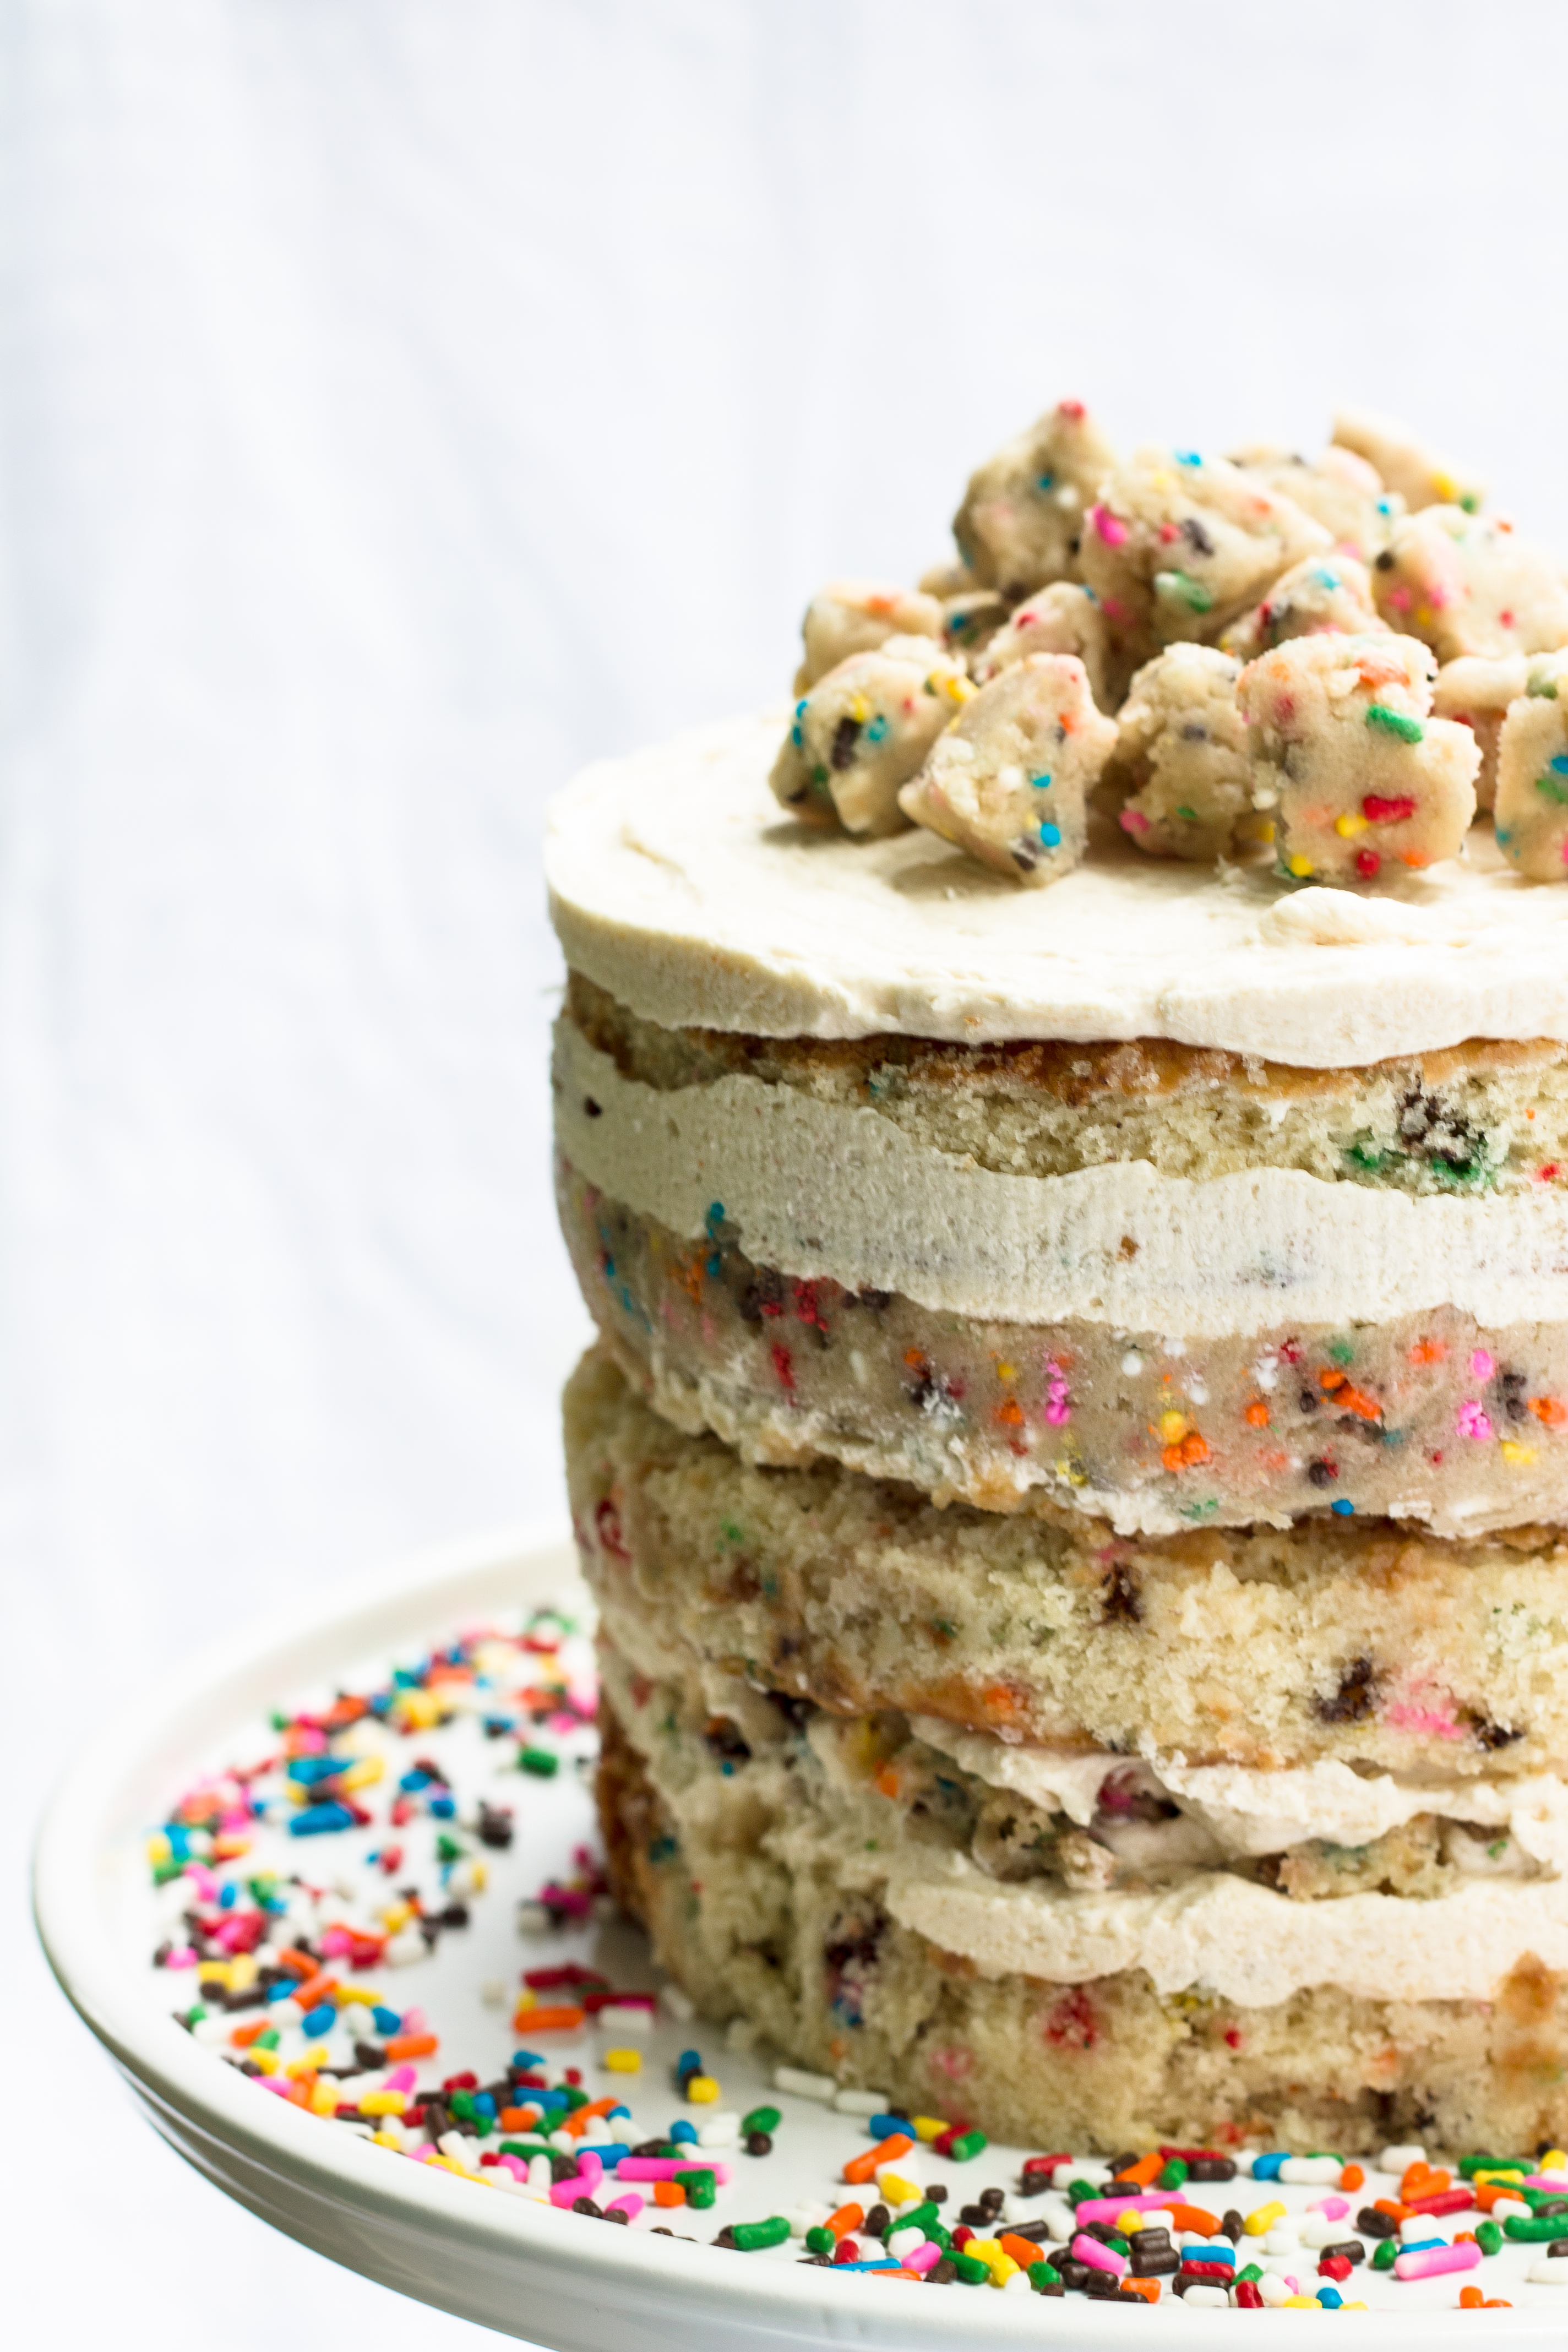
I was really excited to make this recipe. The Momofuku Milk Bar birthday cake is widely praised across the internet and, while I knew it would be a more difficult recipe, I wanted to overcome the challenge. I have a hard time trying recipes without including my own additions. After trying a new treat, Will always asks, “so, what is in this and what did you add to the recipe?” Another well known fact in our house is that I love cookie dough. I love making it, I love eating it, I love baking it into cookies. Before we started dating, Will actually referred to me as “Cookie Girl,” because I would bring homemade cookies to school whenever I had the chance (which was always). Since this recipe was already covered in sprinkles, I decided to create a layer of eggless funfetti cookie dough that could be eaten safely without any time in the oven. Spoiler: it was a great idea, if I do say so myself.
I admit, this is a difficult cake to make and not one that I will be making for every occasion. Delicious but laborious. As I made each part of the cake, I got more and more worried about how the final product would come together. There are so many parts in play in this small sugar rush that it was sometimes difficult to see how everything would taste when the cake was composed. And how in the world was I going to build this thing?! That was a challenge all its own. There may have been some harsh words aimed at the layers during assembly. In the end though, after taking the first bite all of those harsh words were immediately retracted. Amazing.
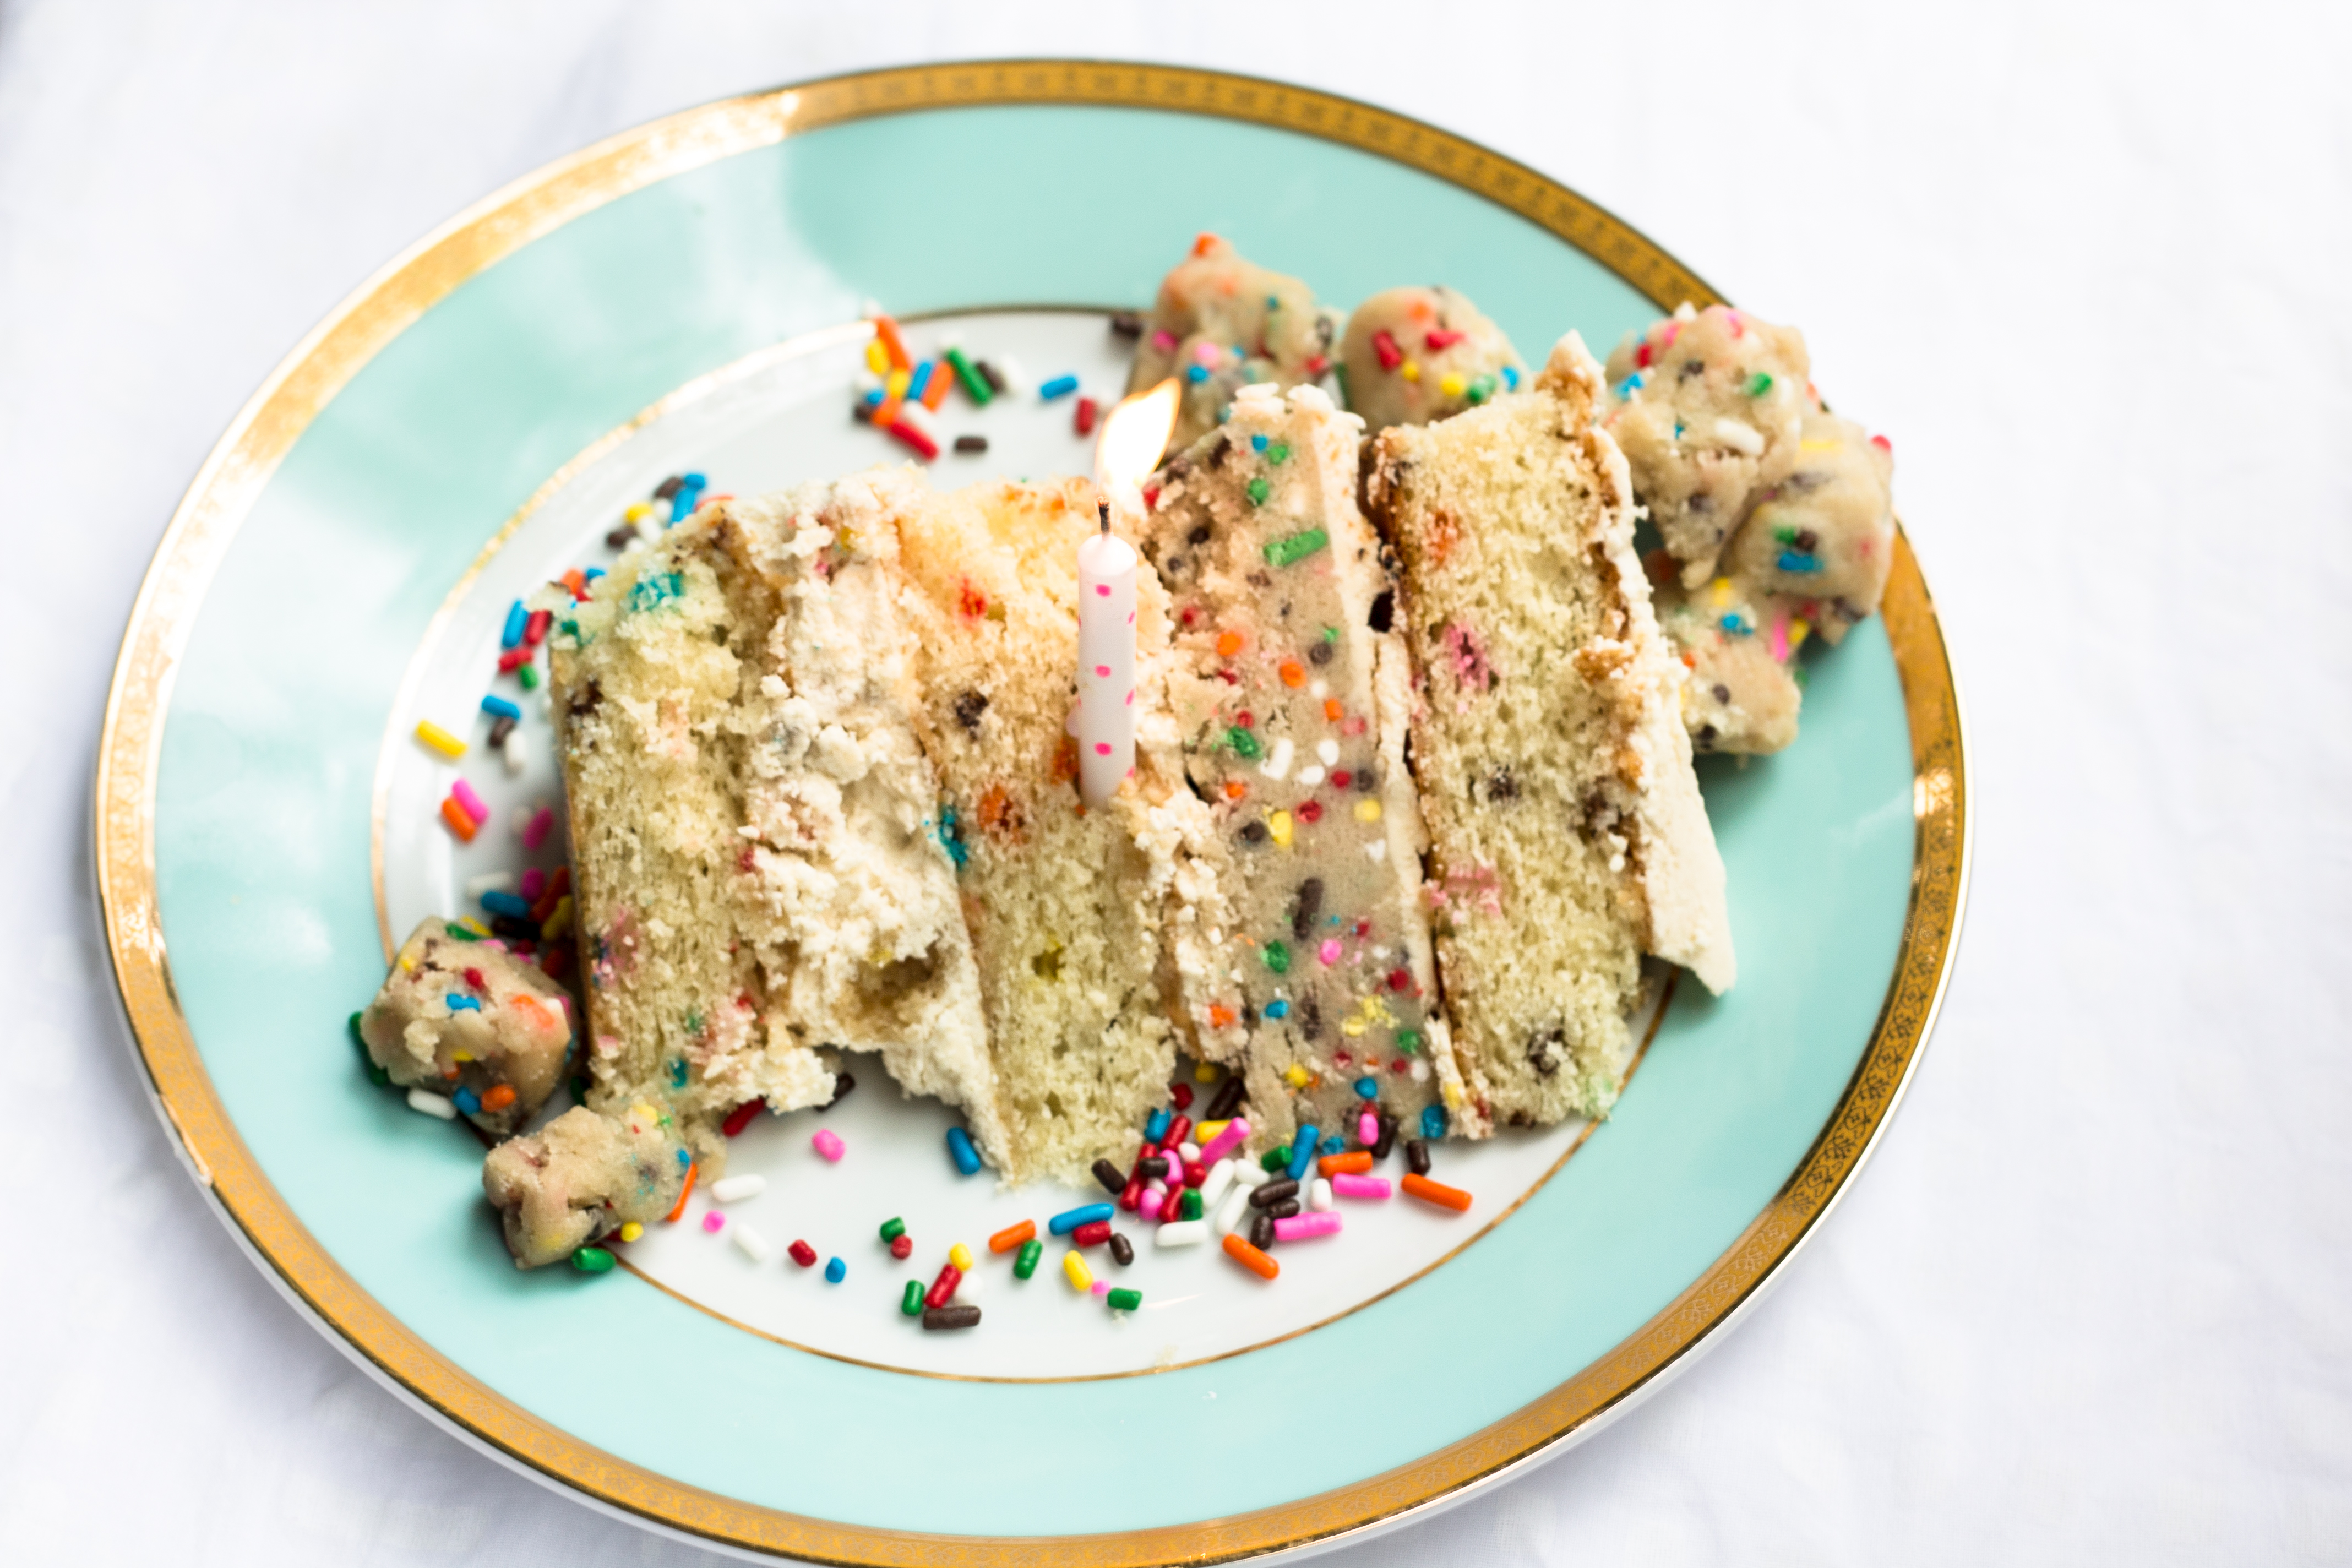
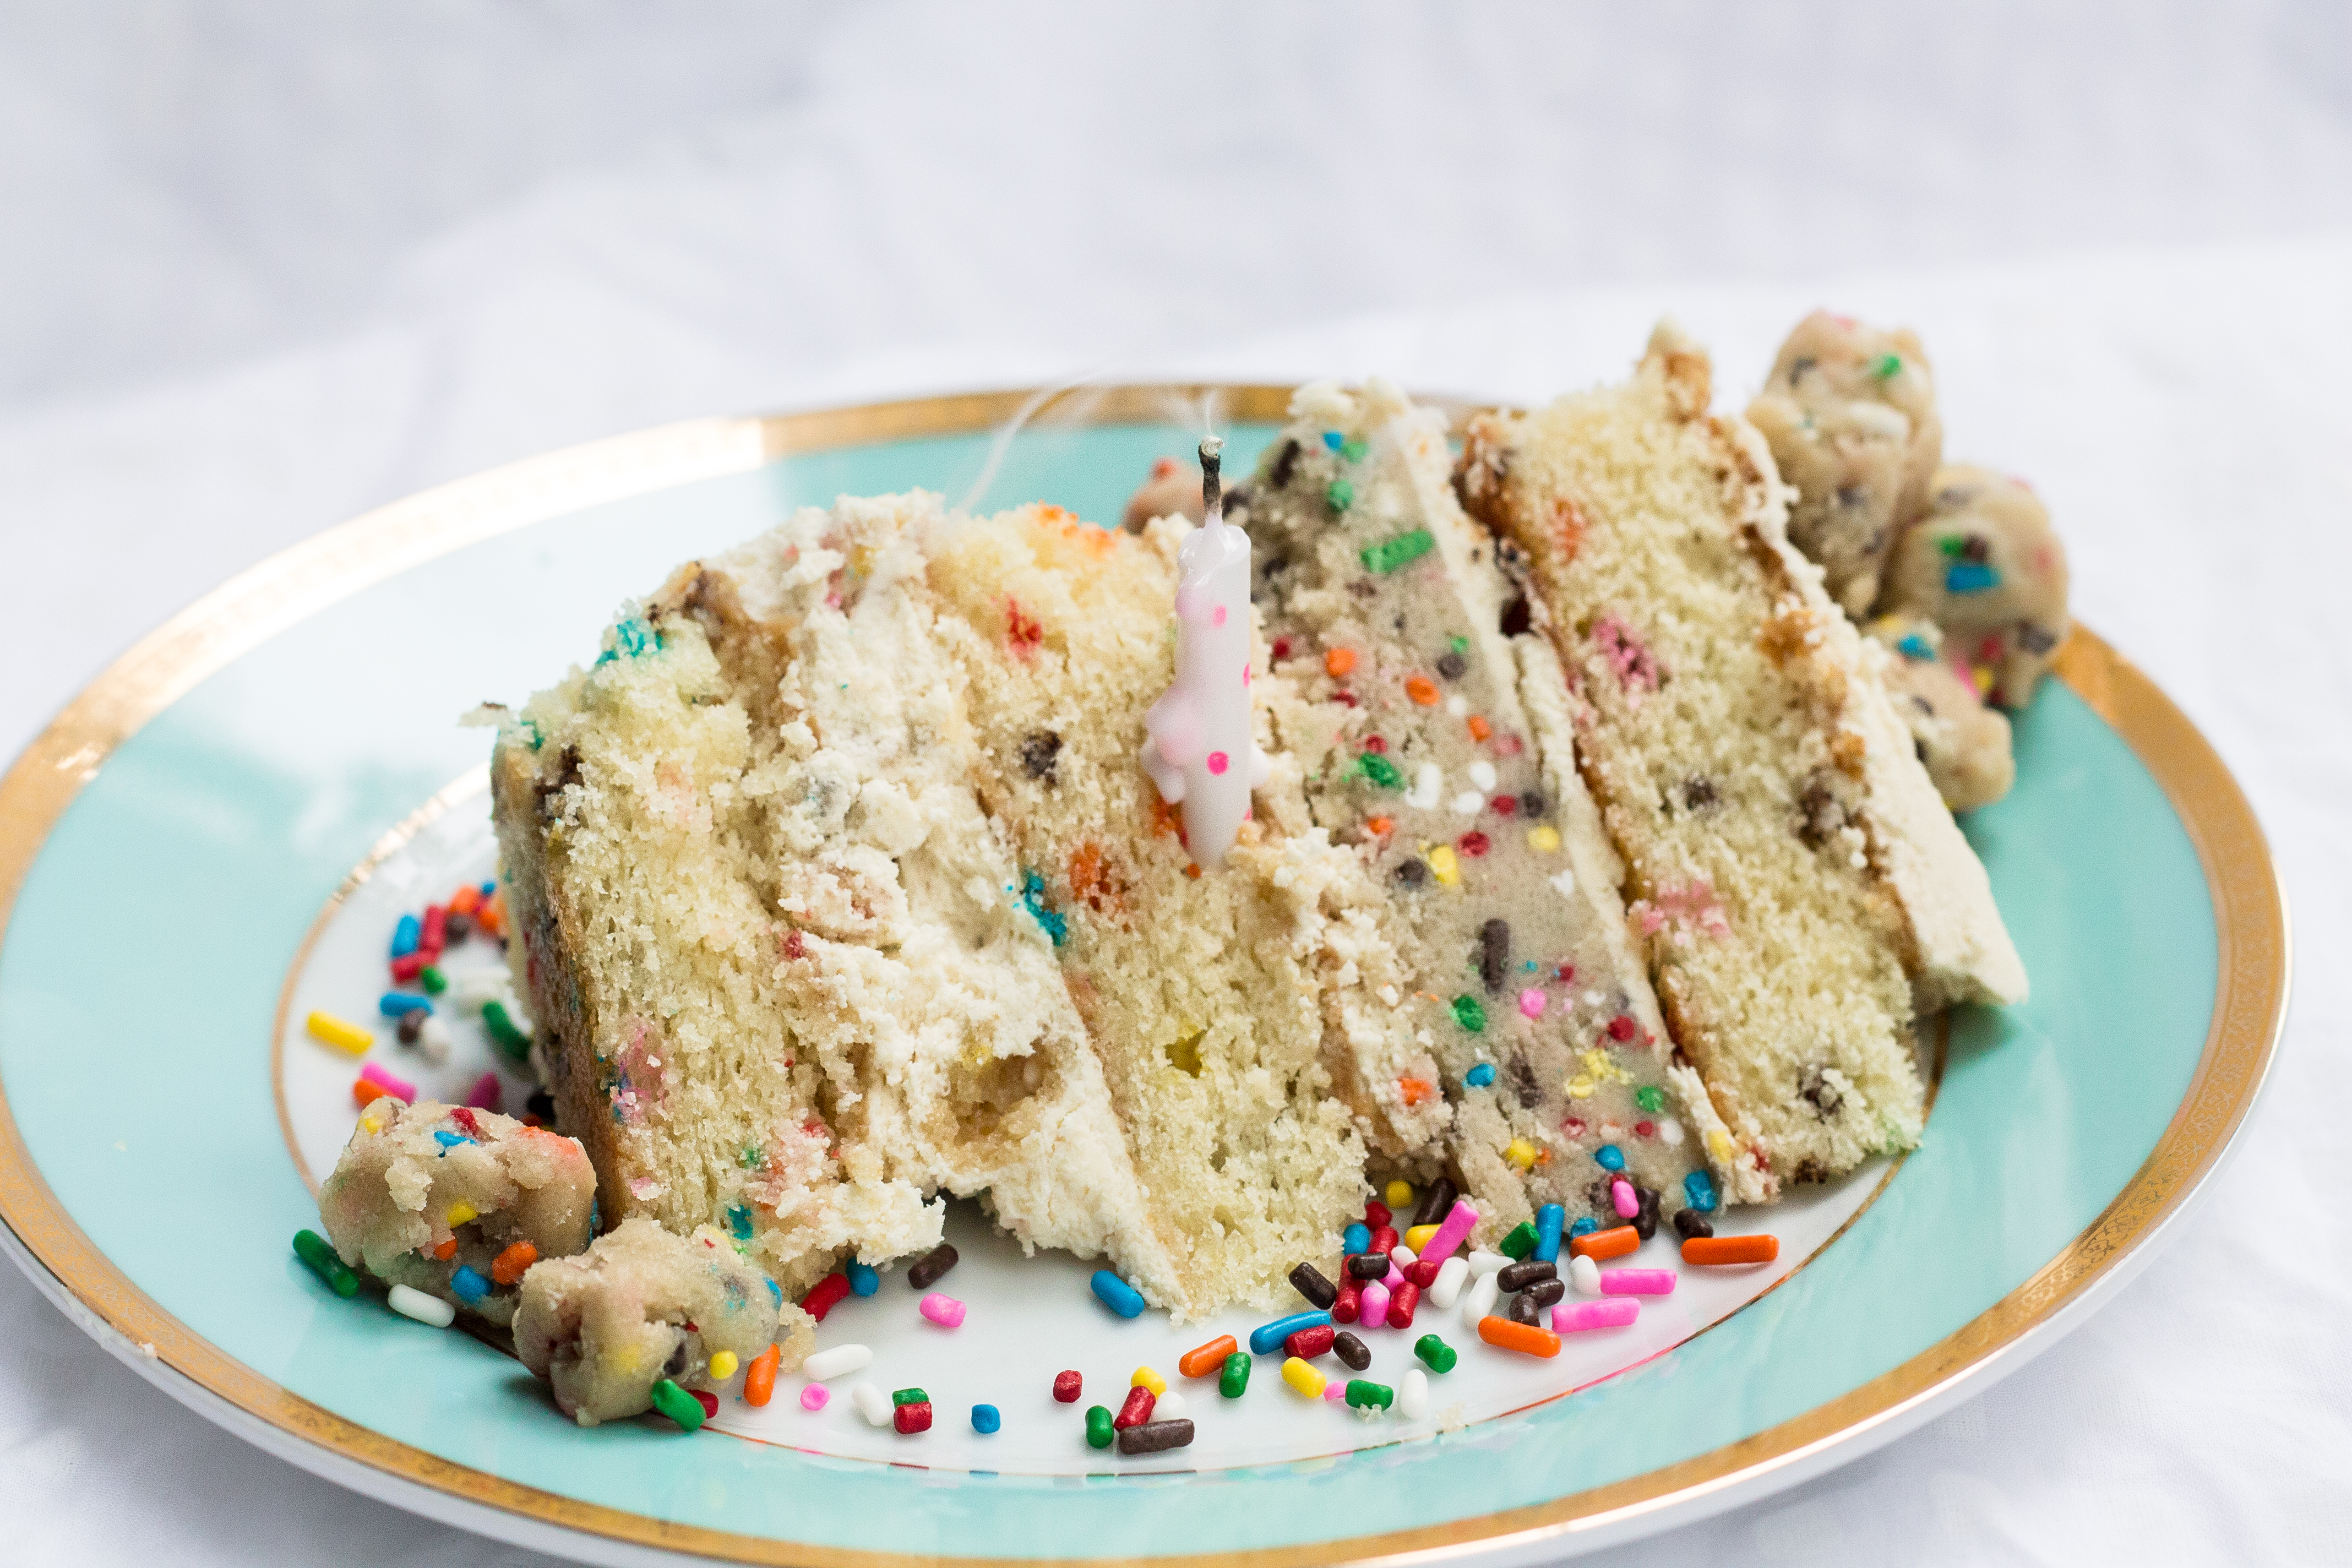
The taste of all of the components melding together was enough to make all of the work worth it. I now understand why the Momofuku birthday cake is so highly regarded and absolutely agree with all of the other internet praisers – this cake deserves all of the acclaim. The cake soak makes the layers incredibly moist and flavorful, the cake crumbs add a little crunch, the cookie dough is divine and dense amidst the fluffy layers and the sweet vanilla frosting binds all of the parts together perfectly. You taste different textures in each forkful and the sprinkles add a wonderful, fun birthday aura.
If you aren’t up for all of the components of the cake, you can still easily and quickly make the cookie dough. And maybe eat the whole recipe while watching Netflix for hours. Just a suggestion. If you are not a sprinkles person, replace them with mini chocolate chips! I’m full of good ideas today! :)
Happiest of birthdays, all you April kings and queens!
Momofuku Birthday Cake with a Cookie Dough Addition
For the Cake
2 cups cake flour
1 ½ teaspoons baking powder
¾ teaspoons kosher salt
¼ cup sprinkles
½ cup buttermilk
1/3 cup canola oil
2 teaspoons vanilla
1 ¼ cup sugar
9 ½ tablespoons butter, room temperature
3 tablespoons brown sugar
3 eggs
For the Cake Soak
¼ cup milk
1 teaspoon vanilla
For the Cake Crumb
¼ cup sugar
1 tablespoon brown sugar
¼ cup plus 2 tablespoons flour
¼ teaspoon baking powder
1/8 teaspoon salt
1 tablespoon sprinkles
2 tablespoons butter, melted
1 ½ teaspoons vanilla
For the Cookie Dough
½ cup butter
1 cup brown sugar
¼ cup sugar
3 tablespoons milk
2 teaspoons vanilla
1 ¾ cups flour
½ teaspoons kosher salt
¾ cup sprinkles
For the Frosting
¾ cup butter, room temperature
2 ounces cream cheese, room temperature
1 tablespoon vanilla extract
1 ½ cups powdered sugar
¼ teaspoon kosher salt
¼ teaspoon baking powder
To make the cake
Preheat oven to 350 degrees F. Line a 13×9” baking sheet with parchment paper and cover with nonstick spray.
In a large bowl, whisk together the flour, baking powder, salt and sprinkles.
In a medium bowl, combine the buttermilk, oil and vanilla.
In the bowl of an electric mixer, beat the sugar, butter and brown sugar on medium high until light and fluffy, about 4 minutes. Scrape down the sides and bottom of the bowl and add the eggs one at a time, beating after each addition. Continue to beat mixture, occasionally scraping down sides, until the mixture has almost doubled in volume and is a light, fluffy and pale yellow. This should take about 4 minutes.
Reduce the speed of the mixer to low and pour in buttermilk mixture until incorporated. Add the dry ingredients, beating just until everything is combined, about 1 minute.
Spread the batter into your prepared pan and smooth the top. Bake 30-35 minutes or until cake is a light golden and a toothpick inserted into the center comes out clean. Cool the cake in the pan.
*If you make the cake ahead of time you can store the cooled cake wrapped completely in plastic wrap in the fridge or the freezer for up to 5 days.
To make the cake crumb
Preheat the oven to 300 degrees F and line a baking sheet with parchment paper.
In the bowl of an electric mixer combine the sugars, flour, baking powder, salt and sprinkles. Mix on low speed until all ingredients are combined.
With mixer on low speed, stream in the melted butter and vanilla and continue beating until all of the ingredients clump together. Crumble the mixture onto the prepared baking sheet like you would crumble topping on a coffee cake, with some large clusters and some small. Bake for about 15 minutes, tossing occasionally towards the end of baking time. The pieces will harden as they cool. Let them cool completely before using.
To make the cookie dough
Spray an 8-inch cake pan with nonstick spray and line the bottom of the pan with a parchment paper circle.
Using an electric mixer, cream butter, brown sugar and sugar on medium speed until light and fluffy, about 3 minutes. Add milk and vanilla, mixing until all ingredients are combined. Reduce the speed of the mixer to low and add flour, salt and sprinkles just until incorporated.
Spread the dough evenly in the prepared cake pan and refrigerate for at least 2 hours, or until ready to assemble.
To make the frosting
Beat the butter and cream cheese with an electric mixer until fluffy and smooth, about 2-3 minutes. Scrape down the sides of the bowl.
With the mixer on low, add the powdered sugar, salt and baking powder until just combined. Add the vanilla and beat until the frosting is light, creamy and smooth, about 4 minutes.
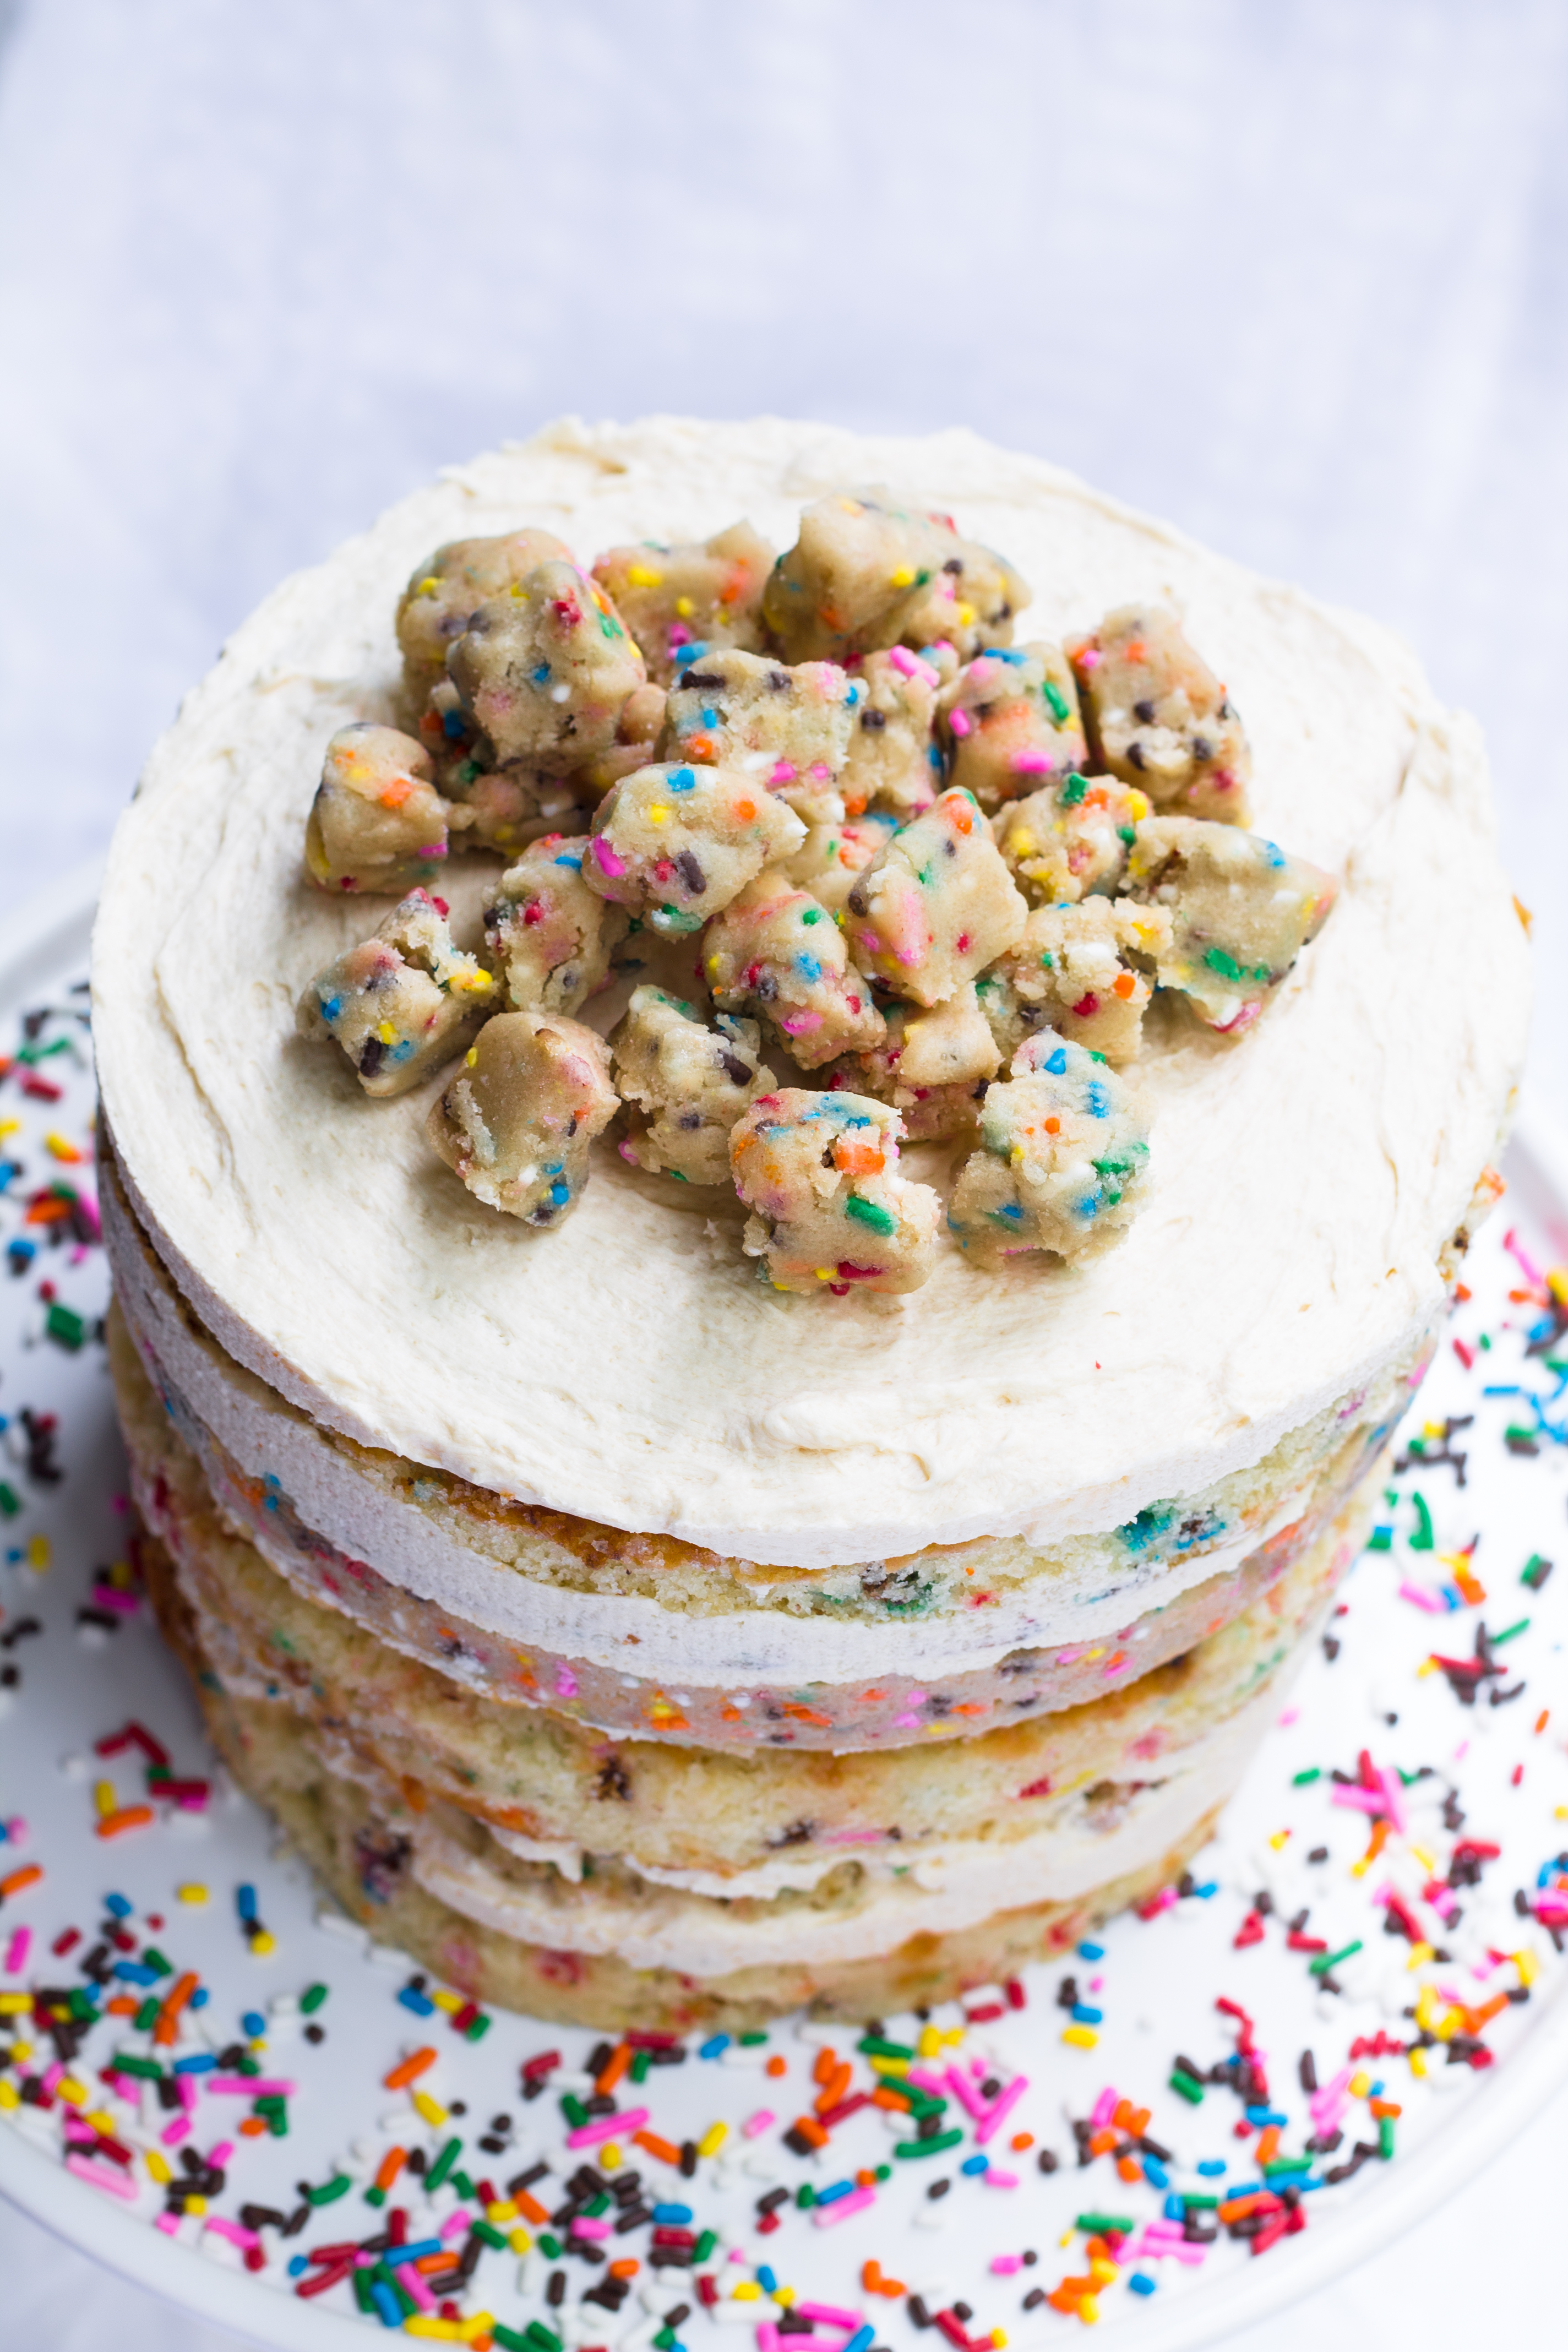
To assemble the cake
Place a piece of parchment paper on the counter, long enough to fit the cake. Invert the cake onto the counter and peel the parchment that was on the bottom of the cake pan off of the cake. Using a bowl or another cake pan as a guide cut out two 6-inch rounds of cake. The two circles will be two layers of your cake; some of the cake scraps will form the bottom layer.
Using the same 6-inch guide cut a 6-inch circle out of your cookie dough. Save the scraps for cake topping.
Line a pan with a clean piece of parchment paper. Place your 6-inch pan or guide in the center of the pan. This is where it can get tricky. Use an acetate strip or a silicone baking mat to line the inside of your guide. Place the cake scraps in the center of your ring and press them together into a flat, even layer. This layer can be messy, since it is hidden on the bottom, but it does need to be flat to provide a good base.
Make the cake soak: combine the milk and vanilla in a small bowl. Dip a pastry brush into the mixture and use half of it to soak the base layer. If it seems like too much liquid you are doing it right.
Spread about 3 tablespoons of frosting evenly over the bottom layer of milk-soaked cake scraps. Sprinkle ¼ of the birthday crumbs evenly over frosting and use your hand to press them into place in the frosting. Top the crumbs with another 3 Tablespoons of frosting and spread evenly without disturbing the crumbs too much.
Place your first cake round on top of the frosting layer. If you have one cake layer that is not as pretty as the other, use that for this layer and save the prettier one for the top. Brush the cake round with the remaining milk soak and spread another 3 tablespoons of frosting on top of the cake.
Place the cookie dough round into the frosting, smooth side up. Layer another 3 tablespoons of frosting on this round and place the final cake layer on top of the stack. Cover the top of the cake with remaining frosting. Transfer cake to the freezer and freeze for at least 3 hours to set the cake and filling.
At least 3 hours before serving the cake remove it from the freezer and pop the cake out of your guide and gently pull off the acetate or silicone mat. Transfer the cake to a cake plate and defrost in the fridge for at least 3 hours.
Top with remaining cookie dough scraps and sprinkles and serve!
Cake based on and adapted from Momofuku Milk Bar’s Birthday Cake recipe.

[…] Best Momofuku Birthday Cake from cookie dough momofuku funfetti birthday cake Pass the. Source Image: http://www.passthecookies.com. Visit this site for details: http://www.passthecookies.com […]